 AceHawky
AceHawky
AceHawky
Choosing the right Night Vision Scope Crossbow begins with more than magnification or marketing claims. A dark field exposes weak glass, poor controls, and unreliable mounting systems. The best setup should provide a clear image, stable alignment, comfortable eye relief, and simple operation when temperatures drop.
John B. Snow, a respected outdoor and shooting editor, has often emphasized a practical principle: “The best optic is the one you can operate confidently under real conditions.” That idea matters here. A crossbow scope must work with the bow’s recoil, mounting rail, bolt trajectory, and your intended observation distance. Night vision can also change depth perception. A target may appear closer than it is.
This guide presents seven useful tips for selecting a Night Vision Scope Crossbow. It considers image quality, infrared illumination, battery life, durability, reticle design, mounting compatibility, and legal responsibility. Check local regulations before purchasing or using any night-vision equipment. Rules may differ by region, season, species, and land type.
Small details matter. A stiff focus ring can become frustrating with cold fingers. A bright infrared lamp may reveal your position or disturb nearby wildlife. A heavy optic can make a balanced crossbow feel awkward.
There is no perfect model. Budget limits, weather, terrain, and eyesight all influence the decision. Some buyers focus too much on range. That is a mistake worth reconsidering. Practical clarity, safe handling, and dependable performance should guide the final choice.
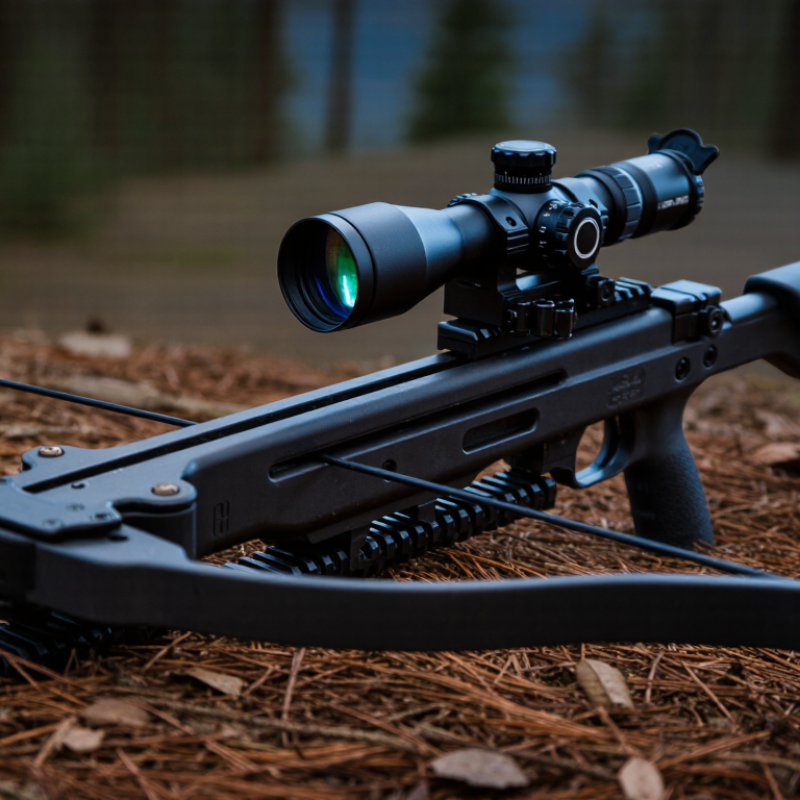
7 Tips for Choosing a Night Vision Scope for Crossbows
Understanding the basics matters more than chasing maximum magnification. Night vision scopes amplify available light or create a digital image from limited light. They do not turn complete darkness into daylight. Image clarity can change with clouds, fog, moonlight, and nearby branches. For crossbow hunting, moderate magnification often works better than extreme zoom. A wider view helps you track movement and maintain awareness around the target.
Tip 1: Check eye relief, weight, and mounting strength. A heavy scope can disturb balance, especially during a long wait. Tip 2: Test the reticle in daylight and low light. It should remain visible without hiding important details. Tip 3: Examine focus controls with gloves. Small, stiff adjustments become frustrating in cold weather.
Digital models may offer recording and adjustable brightness, while traditional systems can provide a more natural view. Infrared illumination can improve visibility, but its range and battery life deserve careful testing. I would not trust a specification sheet alone. Visit a controlled, legal practice area and inspect leaves, bark, and safe backstops at realistic distances. One overlooked detail is sound. Button clicks and battery covers can seem surprisingly loud in quiet conditions. Always confirm local hunting rules, permitted hours, and equipment restrictions before use. Positive target identification remains essential.
| Tip | Selection Dimension | Practical Specifications to Consider | Why It Matters for Crossbow Hunting | What to Check Before Buying |
|---|---|---|---|---|
| 1 | Choose the Right Night-Vision Technology |
Digital night vision Uses an image sensor and display; often supports recording, adjustable brightness, and an integrated infrared illuminator. Traditional image intensification Uses ambient light amplification and generally requires more careful handling and storage. |
Digital systems are commonly easier to adjust and can operate in very low-light conditions when paired with infrared illumination. Traditional systems may provide a more natural viewing image but can be more sensitive to bright light exposure. | Confirm whether the unit is digital or image-intensifier based, and read the operating restrictions for daylight and artificial light. |
| 2 | Match Magnification to Hunting Distance | A low magnification range, such as approximately 2× to 6×, is usually practical for identifying a target and maintaining a usable field of view. | Excessive magnification narrows the field of view and can make it harder to locate moving game. Moderate magnification helps balance target recognition, aiming speed, and image stability. | Compare the scope’s field of view at the expected hunting distance. Avoid selecting magnification based only on the highest advertised setting. |
| 3 | Evaluate Low-Light Performance | Look for clear performance in the intended conditions: moonlight, twilight, woodland shade, or complete darkness with an infrared illuminator. Consider image resolution, sensor sensitivity, and display brightness. | A scope that performs well at dusk may not provide the same clarity in dense cover or on moonless nights. Low-light performance directly affects target identification and safe shot placement. | Review sample footage or test the scope in conditions similar to your hunting environment. Check for excessive noise, blur, glare, and delayed image refresh. |
| 4 | Select an Appropriate Infrared Illuminator | An adjustable infrared illuminator is useful for dark conditions. Common wavelengths include approximately 850 nm and 940 nm; 850 nm generally offers more illumination, while 940 nm is less visibly red to many observers but may have reduced effective range. | Infrared illumination can improve image detail when ambient light is insufficient. The best choice depends on required range, concealment needs, battery capacity, and local hunting regulations. | Verify the illuminator’s effective range, beam adjustment, mounting position, and whether its wavelength is permitted where you hunt. |
| 5 | Check Recoil and Mounting Compatibility | Choose a scope with a stated recoil rating suitable for crossbow use and a secure mounting system, commonly compatible with a Picatinny or Weaver-style rail. | A crossbow produces vibration and shock during firing. A mount that shifts can change the point of impact, while an unsuitable scope may lose zero or suffer internal damage. | Confirm rail compatibility, mounting screw quality, eye relief, clearance from the string and limbs, and the manufacturer’s crossbow-use guidance. |
| 6 | Prioritize Battery Life and Field Controls | Prefer a system with a practical operating time of several hours, replaceable or rechargeable power options, accessible controls, and an automatic shutoff or standby mode. | Cold weather, infrared illumination, video recording, and high display brightness can reduce runtime. Simple controls are especially valuable when adjustments must be made quietly in the field. | Check battery runtime with infrared illumination enabled, charging requirements, battery type, low-battery warnings, and the location of zoom and brightness controls. |
| 7 | Verify Accuracy, Weather Protection, and Legal Use | Look for repeatable zeroing, a suitable reticle, positive windage and elevation adjustments, and weather protection such as water resistance. Confirm that night-vision equipment is legal for the target species and season. | A clear image does not guarantee an ethical shot. Reliable adjustments and a stable zero are essential, while weather resistance helps protect the optic from rain, dust, and condensation. | Sight in with the exact bolt, broadhead, and accessories used for hunting. Recheck zero after transport and consult current local wildlife regulations before use. |
It amplifies available light or creates a digital image from limited light. It cannot make total darkness look like daylight.
Moderate magnification often works well at 20 to 30 yards. Higher power can narrow your view and hinder movement tracking.
Proper eye relief keeps your brow safely away during the shot. This detail is easy to underestimate.
Check it during daylight and low light. It should remain visible without covering leaves, branches, or the target area.
Choose a secure, low-profile mount that maintains alignment. Test it with your actual bolt weight and draw setting.
Yes, infrared light can reveal bark, leaves, and uneven ground. Too much light may wash out the image. Too little may hide hazards.
Check performance in moisture, cold air, and repeated vibration. Test focus controls while wearing gloves.
Practice at the real shooting distance in an authorized, controlled area. Inspect safe backstops and confirm range estimates manually. A clear display is not proof of safety.
Yes, heavy equipment can disturb crossbow balance during a long wait. Button clicks and battery covers may sound loud in quiet conditions.
Check local hunting rules, permitted hours, and equipment restrictions. Requirements differ by location, so assumptions can cause problems.
Choosing the right Night Vision Scope Crossbow setup begins with understanding how night vision works and how it supports safe, accurate shooting in low-light conditions. Consider your crossbow’s specifications, rail system, effective range, and the type of terrain where you plan to use it. The scope’s magnification should match your typical shooting distance, while image clarity and field of view should provide enough detail without making target tracking difficult.
A reliable scope should also withstand recoil, moisture, dust, and changing temperatures. Check battery life carefully, especially if you expect extended outdoor use, and choose a power system that is easy to monitor and replace. Before purchasing, confirm mounting compatibility and allow enough clearance for the crossbow’s design. Comparing these factors with the total cost will help you find a practical, durable, and well-balanced option for responsible, lawful outdoor use.
